Windows Mail Configuration
Please note Windows Mail was included only with Windows Vista. Please consider upgrading to Windows Live Mail instead.
If you have any questions about these steps, please contact us.
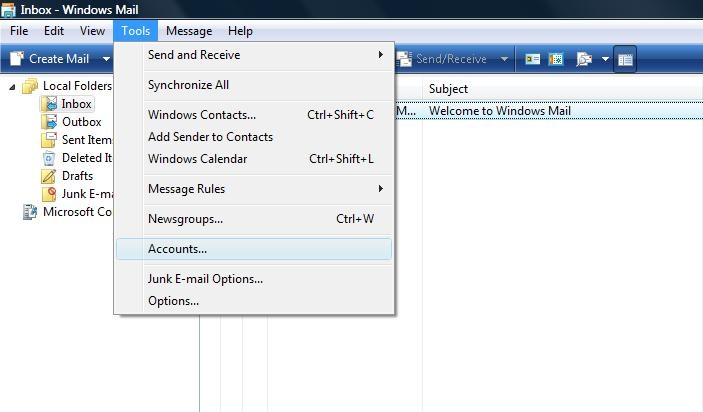
Step 1: Open Windows Mail and select Accounts from the Tools menu.
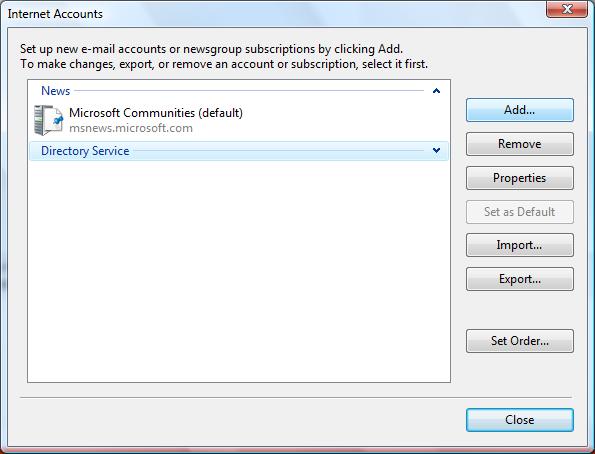
Step 2: Click the Add button.
Step 3: Select E-mail Account.
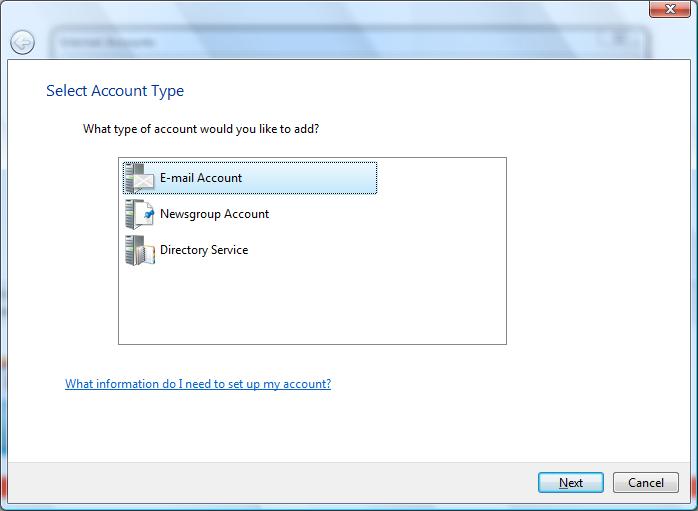
When finished, click "Next".
Step 4: Enter your name as you would like it to appear when sending e-mail to someone.
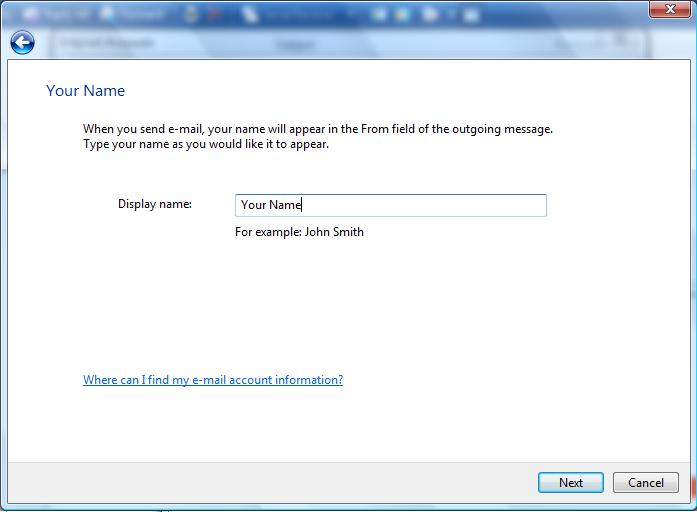
When finished, click "Next".
Step 5: Enter your e-mail address that was given to you.
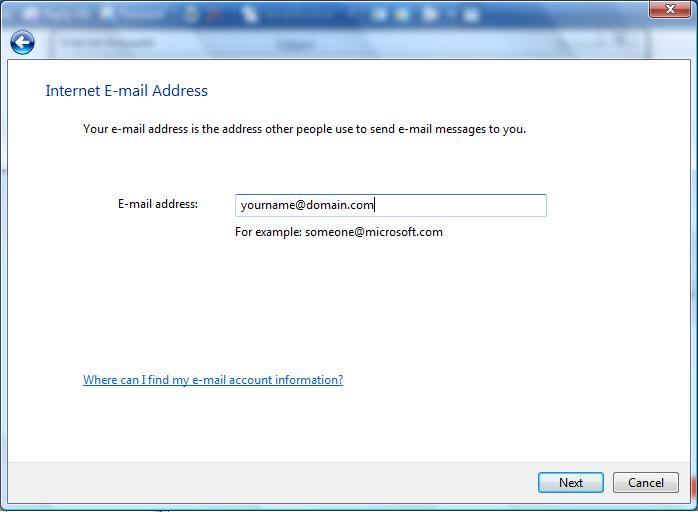
When finished, click "Next".
Step 6:
- Make sure that POP3 is selected where it says Incoming e-mail server type.
- Enter pop.bdhtek.com for the incoming mail (POP3) server.
- Enter smtp.bdhtek.com for the outgoing e-mail server (SMTP) name.
- Check the box next to where it says Outgoing server requires authentication.
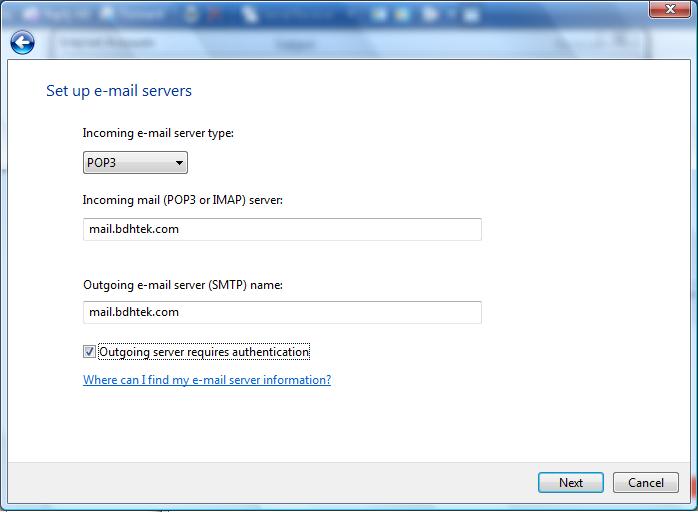
When finished, click "Next".
Step 7: Enter your FULL e-mail address as your E-mail username. Enter your password that was given to you in the password field.
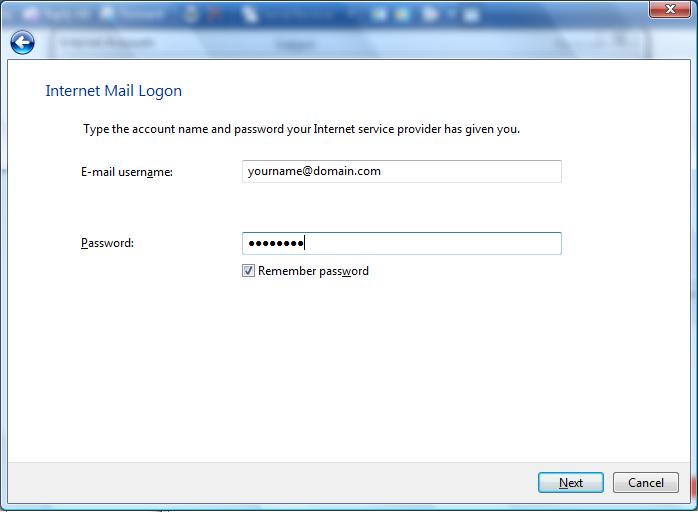
When finished, click "Next". On the next window click "Finish"
Step 8: On the Internet Accounts screen you will see your account named mail. Click on it in the list and select the Properties button on the right side.

Step 9: Click on the Advanced tab in the same window, and check both boxes next to where it says This server requires a secure connection (SSL) under Outgoing mail (SMTP) & Incoming mail (POP3) mail. Enter 465 in the Outgoing mail port field. By default 995 should be inside the Incoming mail port field, if it's not, enter it in.
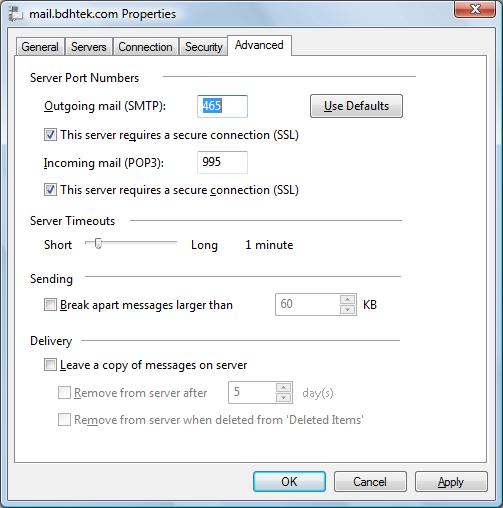
Hit OK, and then click Close on the next window.
Click here to go back to the e-mail configuration page.
Don't see what you are looking for? Have more questions? We're here to help. Just contact us for a free, no-obligation estimate.