iPhone/iPad/iOS Email Configuration
The steps and dialogs listed below are from iOS version 4, so the steps may look a little different for another version. If you have any questions about these steps, please contact us.
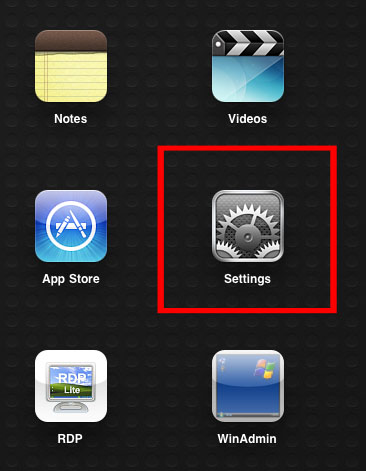
Step 1: Open the Settings App.
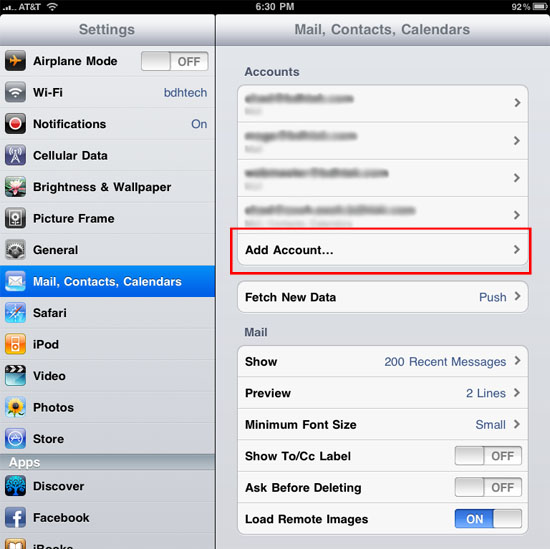
Step 2: Choose Mail, Contacts, Calendars and select Add Account...
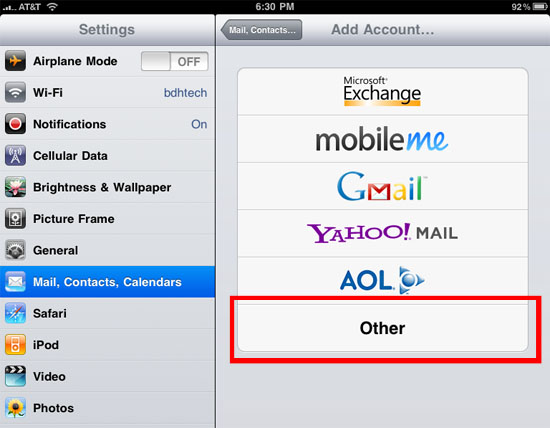
Step 3: Choose Other.
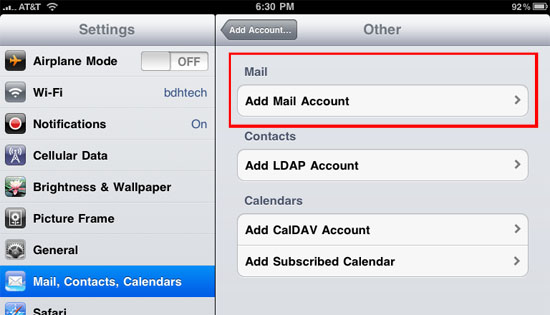
Step 4: Choose Add Mail Account.
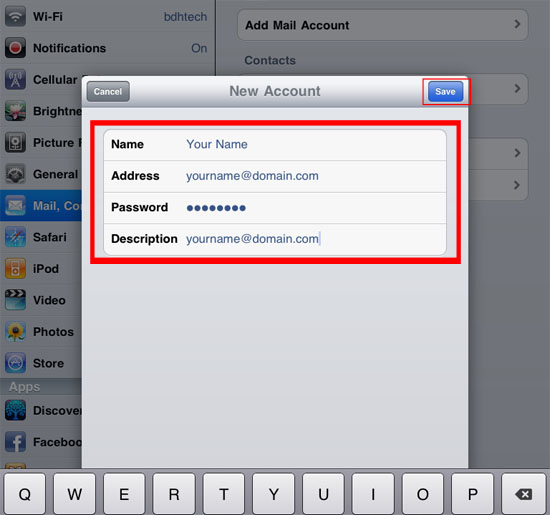
Step 5: Fill in the blanks with the information provided to you. Use the picture below for assistance. When finished select the save button in the upper right hand corner.
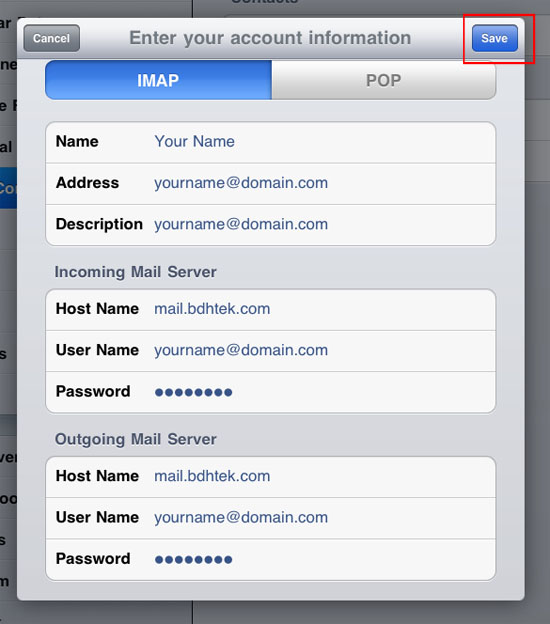
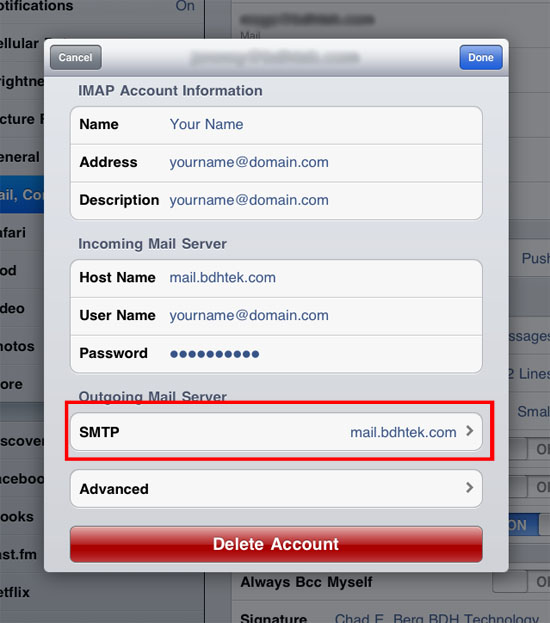
Step 6: On the next page page fill in the blanks accordingly making sure that Host Name for Incoming Mail Server is pop.bdhtek.com and the Host Name for Outgoing Mail Server is smtp.bdhtek.com Select save after completing.
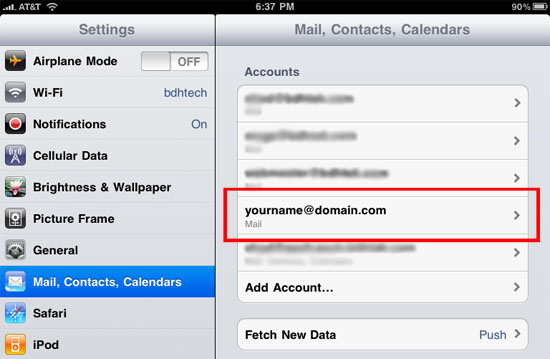
Step 7: Now you should see your email address account. You will now want to select that account to verify further information.
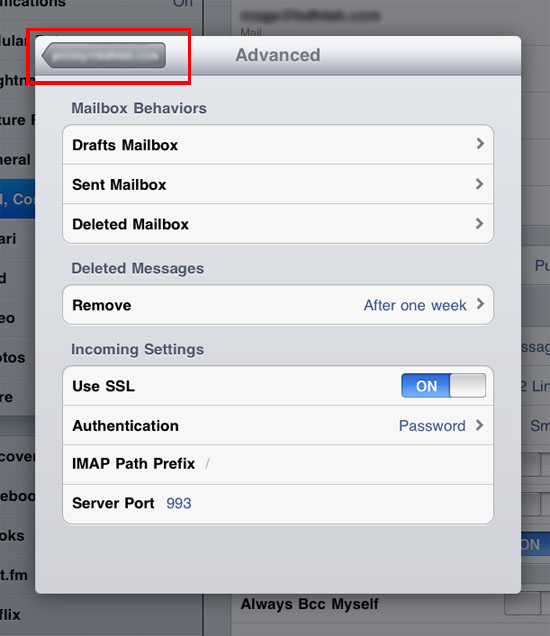
Step 8: The next couple of steps are to make sure all of the setting are correct. Select Advanced.

Step 9: Make sure that the server port is set to 993. When finished select the gray arrow in the left hand conner of the box.
Step 10: Now you will want to select SMTP.
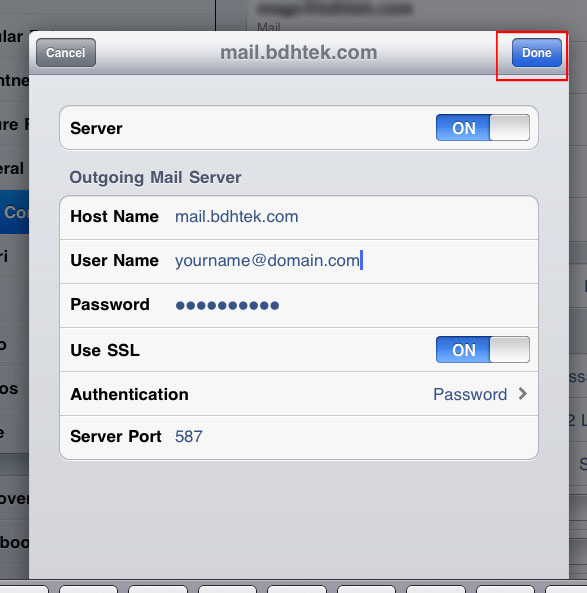
Step 11: Verify that the server port is set to 587. When finished select the blue box in the right hand corner labled Done. Congratulations. Your email is now set up on your iPhone/iPad.
Click here to go back to the e-mail configuration page.
Don't see what you are looking for? Have more questions? We're here to help. Just contact us for a free, no-obligation estimate.